¶ Imaging & PACS Storage
¶ What you'll be able to do
After reading this guide you will be able to upload dental radiographs (X-rays) in VeriPath Dental — including DICOM files straight from the X-ray machine — and view them again later with their automatic AI analysis. You will learn what happens to the file when you upload it (object-store storage, rendered copy, scan type) and how to read the AI analysis that flags possible findings such as caries or bone loss.
Who does this? Dentists and dental hygienists record and review radiographs within their clinical scope. Practice managers and dental admins can view the list and records. Receptionists do not see Radiographs in their menu and cannot open the screens — clinical images are DSPT Category 3 data. Images are stored centrally (object storage) so the whole practice can view the same scan.
Related guide: for the X-ray / imaging storage design and the PACS (DICOM) architecture, see the infrastructure documentation. This page is about the day-to-day screens.
¶ Before you start
You will need:
- A VeriPath Dental login with a clinical role (Dentist or Dental Hygienist)
- The appointment the radiograph was captured at — the upload is anchored to an appointment, and the patient and practice are taken from it
- The image file to upload — a PNG/JPG image or a DICOM (.dcm) file exported by the X-ray machine
¶ About imaging storage
Every radiograph you upload is stored centrally in the practice's object store and linked to the patient's electronic record. This means:
- The image is available from any screen in the practice, not just the machine it was taken on.
- The original scan stays in storage while the app serves a viewable copy.
- DICOM files are stored twice: the original
.dcmis kept untouched, and a rendered PNG is generated from it for viewing on screen. - Each upload carries a type (bite wing, periapical, panoramic, cephalometric) so scans are easy to find.
Images are served only through the authenticated radiograph screens — never from a public folder.
¶ Step 1: Open the Radiographs screen
- Log in to VeriPath Dental.
- Click Radiographs in the top navigation bar.
The Radiographs list opens, most recent first, with an Upload button at the top right and a Patient filter (choose a patient to narrow the list, or Clear filter to show everyone).
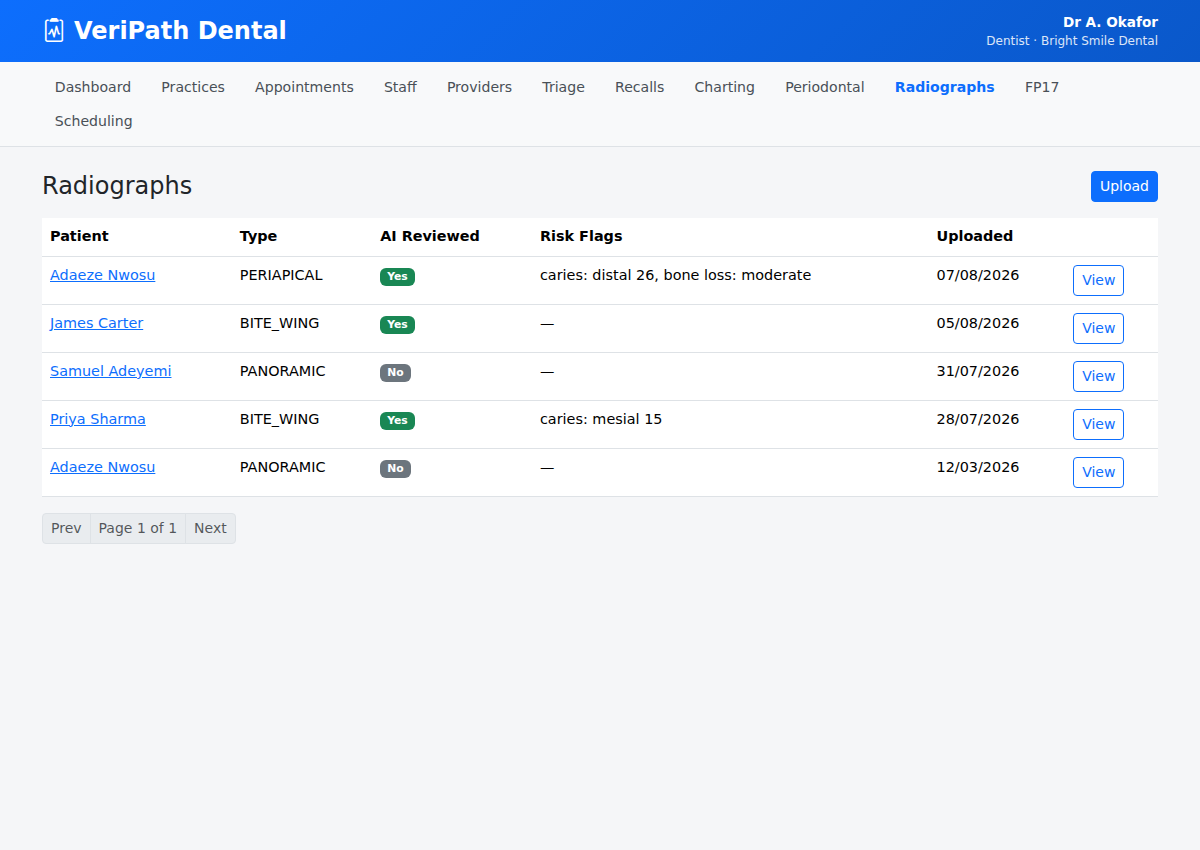
| Column | What it shows |
|---|---|
| Patient | The patient the scan belongs to (click to filter the list to that patient) |
| Type | The radiograph type, e.g. BITE_WING, PERIAPICAL, PANORAMIC |
| AI Reviewed | Yes (green) once the AI has analysed the scan, or No (grey) |
| Risk Flags | AI-detected findings, e.g. caries: distal 26 — or — when there are none |
| Uploaded | Date the scan was added |
| View | Opens the full scan with details and AI analysis |
¶ Step 2: Upload a radiograph
- From the Radiographs list, click Upload.
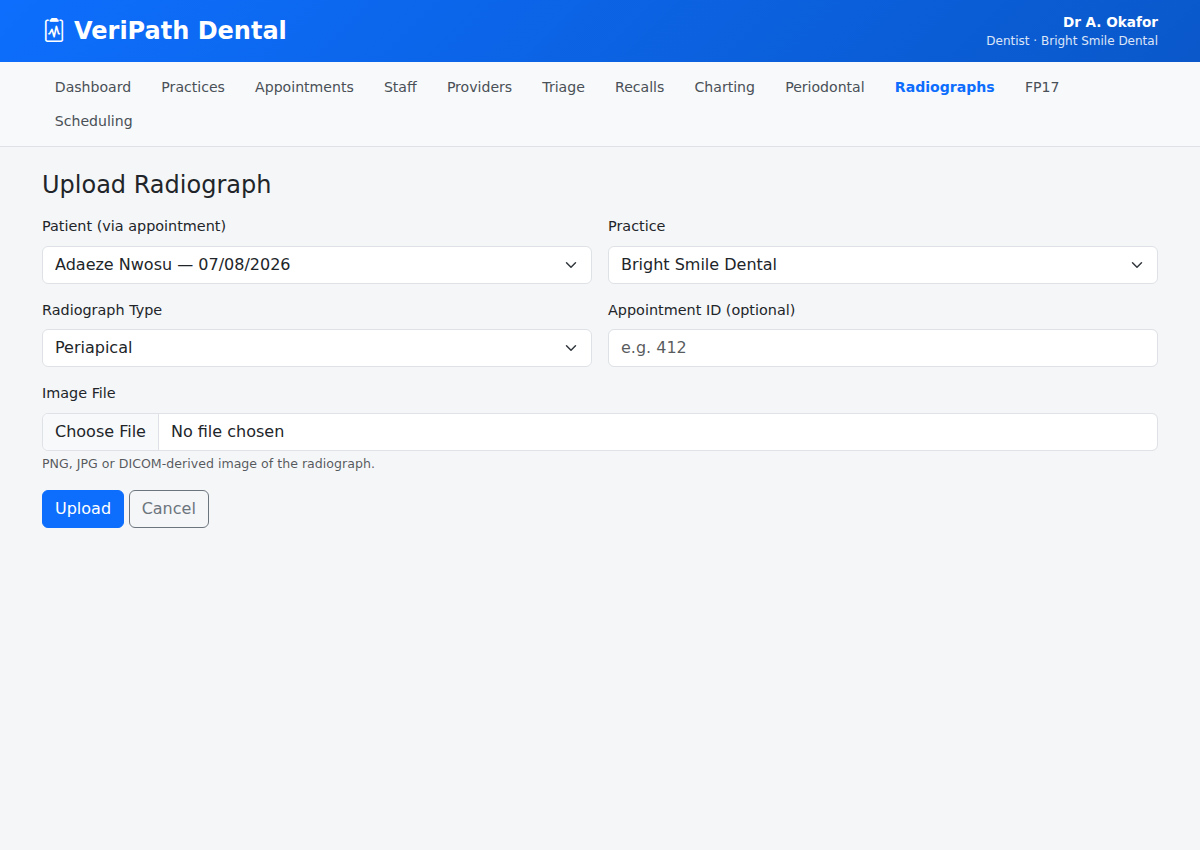
The Upload Radiograph form opens.
¶ Step 3: Choose the appointment
- Appointment (required) — select the appointment the radiograph was captured at. The list shows the patient's appointments, most recent first, as patient — type date (for example "Maria Lopez — Filling 05/09/2026").
- Radiograph Type — choose the scan type for a regular image:
- Bite Wing — for checking between teeth (crowns of upper and lower teeth together).
- Periapical — shows the whole tooth, from crown to root tip.
- Panoramic — a wide view of the whole mouth.
- Cephalometric — a side-profile view used for orthodontics.
- Leave this blank when uploading a DICOM file — the type is read from the scan itself (see Step 4).
- Image File — choose the file: a PNG/JPG image, or a DICOM (
.dcm) file exported by the X-ray machine.
The form explains why the appointment matters: "The patient and practice are taken from the appointment this radiograph was captured at." There is no separate patient or practice field.
¶ Step 4: Upload — what happens to the file
- Click Upload.
The app looks at the content of the file, not just its name:
- PNG/JPG image — the file is stored as-is (under its real file type) and linked to the patient, tagged with the type you chose. You are returned to the Radiographs list, where the new scan appears.
- DICOM file — the file is detected automatically and processed through the imaging pipeline:
- the original
.dcmis stored untouched in the object store, and a PNG is rendered from it for viewing; - the type is taken from the scan's own modality (for example a panoramic export becomes PANORAMIC) — the type selector on the form is ignored for DICOM;
- the capture date is read from the scan's study date;
- the patient is the one from the appointment you chose (sensor exports often carry an empty or placeholder DICOM patient ID — the appointment is authoritative for uploads made through this form);
- the AI analysis runs automatically.
- You are taken straight to the new scan's detail page.
- the original
If a DICOM file cannot be read, the upload is rejected with a clear message ("Could not process the DICOM file…") and nothing is saved — no broken or unviewable records are left behind.
¶ Step 5: View a scan and its AI analysis
- Click View on any row to open the scan.
The Radiograph page shows the AI analysis, the image, and the record details.
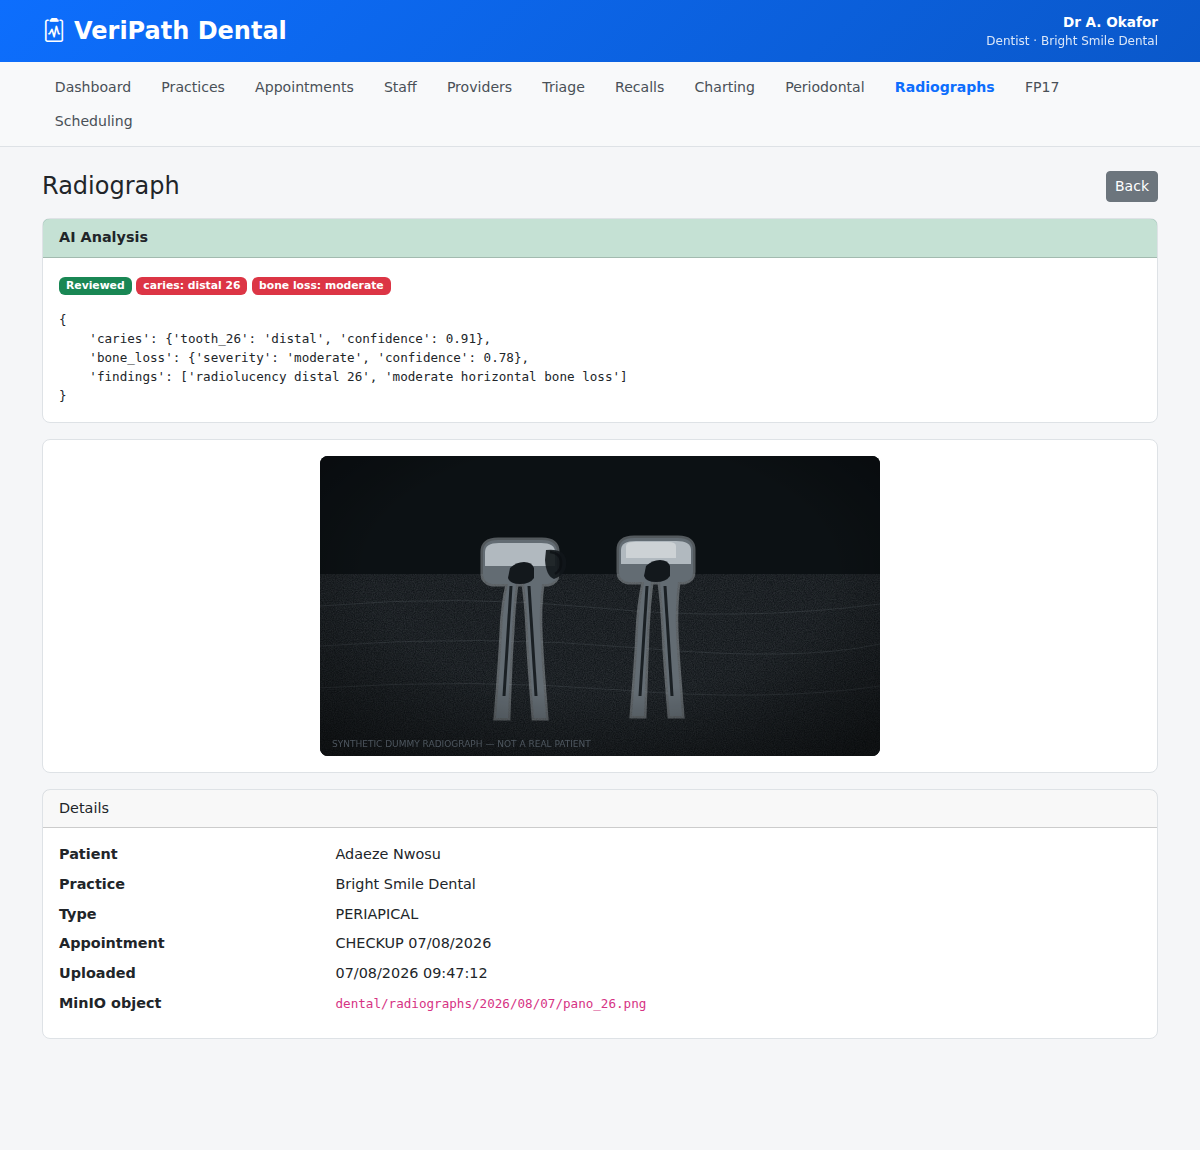
- AI Analysis card — the automatic review of the scan:
- A green Reviewed by AI badge once analysis is complete (the list shows this as Yes).
- Risk flags as red badges for findings such as caries or bone loss — or a grey No risk flags badge when the scan is clear.
- The structured analysis output for clinical review (for example the method used, a plain-English summary, and any findings).
- If the AI has not yet reviewed the scan, the card simply says "Not yet reviewed by AI."
- Image — the radiograph, displayed large so it can be reviewed on screen.
- Details — patient, practice, type, the appointment it was captured at, upload time, and the object store reference (the storage location of the scan).
¶ AI workspace (similar X-ray matching & diagnostic)
Note — added 2026-09-04. When a scan is linked to an appointment, the
Radiograph page also shows an Open in Surgery Workspace button, and the
AI Analysis card includes a Launch Surgery Workspace link for the full
AI workspace (similar historical X-ray matching + AI diagnostic synthesis).
Clicking either link opens the in-surgery workspace for that appointment. The
full AI workspace adds two tools on top of the per-scan AI analysis:
- Similar historical X-ray matching — when a tooth is selected, the system
searches the patient's earlier radiographs for the closest matches and shows
them with a similarity score. - AI diagnostic synthesis — a written comparison of the current scan
against the historical match, for clinical review.
When does this show results? Both tools need the patient to have more
than one AI-reviewed radiograph — the search compares the current film
against the patient's other scans. A patient with only a single scan will
show an empty match list (correct behaviour, not an error).Live demonstration pending (2026-09-04): the workspace link is verified
to appear on appointment-linked scans, but the full matching + diagnostic
flow has NOT yet been exercised live — it needs a patient with several
sample films. Planned as a separate AI-features session (parked here so it
is not forgotten).
¶ Useful tips
- Upload DICOM straight from the machine — no need to convert to PNG first; the app reads the file and renders a viewable copy for you.
- Choose the type for regular images — it makes scans much easier to find later, especially when a patient has several. (DICOM uploads set their own type.)
- Risk flags are a screening aid, not a diagnosis — always review the flagged areas on the image yourself.
- One scan, whole practice — because the image is in the object store, any clinician at the practice can open the same scan from the list.